How To Download The Windows 8.1 ISO Without a Product Key

Finding and downloading a legitimate Windows 8.1 ISO can be troublesome. Microsoft has thankfully released a new app called the Windows Installation Media Creation Tool that takes all the guesswork out of downloading the correct and legitimate version of Windows. A major problem with Windows 8.1 was the fact that you couldn’t do a fresh install of 8.1 if you only had access to an original Windows 8 key. With this tool, it’s now possible to easily download a Windows 8.1 ISO to burn to a DVD or create a bootable USB drive to install it. Follow this simple procedure to download the tool and install the right version for your computer.

step-1

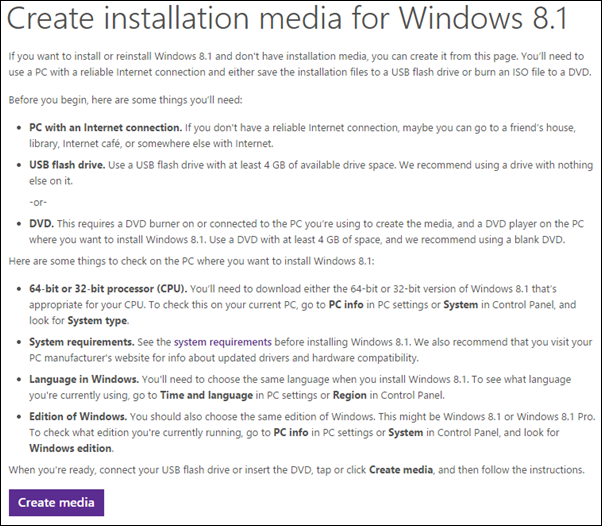
1. Go to Microsoft’s site here. Click ‘Create media‘ to download the tool.

Screenshot-224

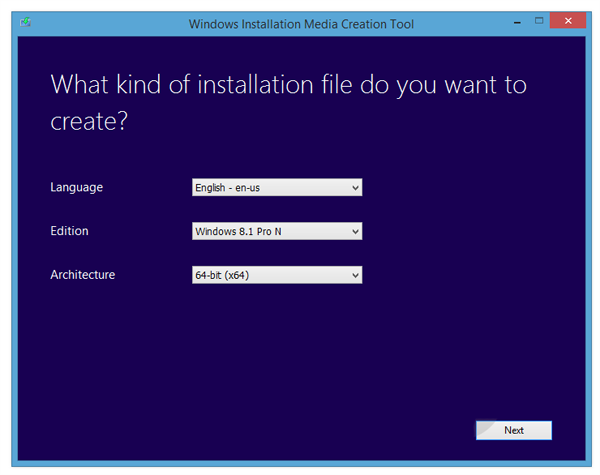
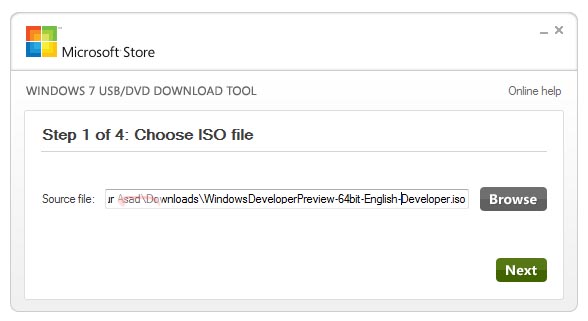
2. Run the tool and you’ll be asked to specify what kind of installation you need. This includes language, edition, and architecture (32-bit and 64-bit). Make sure to select the correct options here and check your PC to see if it’s 32-bit or 64-bit.

Screenshot-225

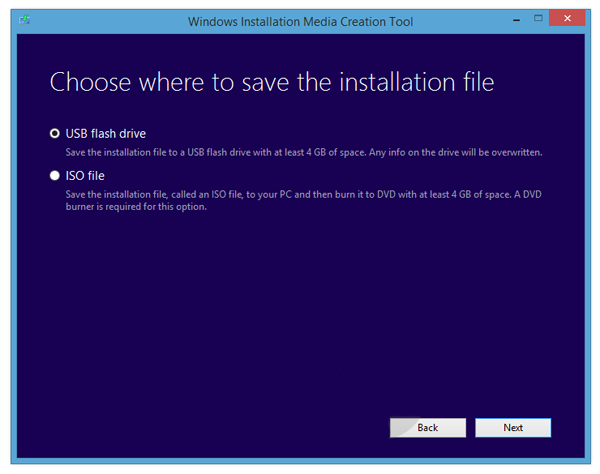
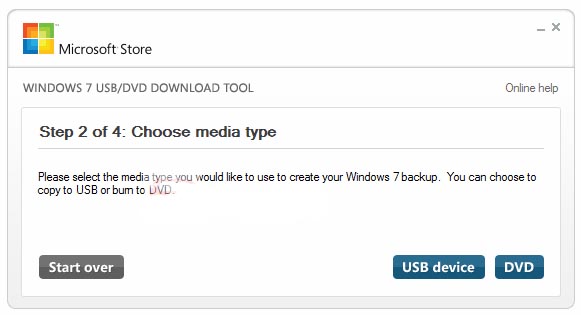
3. Now, choose whether to download to a USB drive or to download the whole ISO file.

Screenshot-226

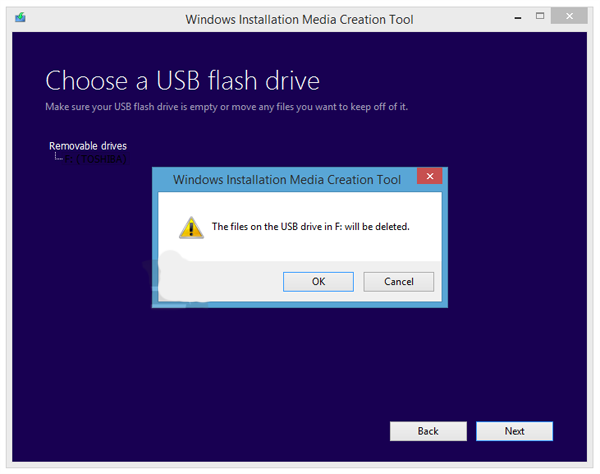
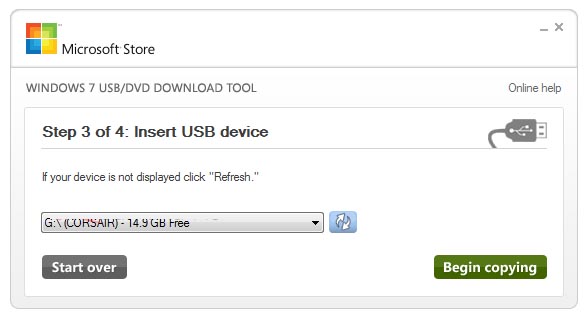
4. If you’re downloading to a USB drive, be sure to format it beforehand and move any files off of it. The process will overwrite anything on the drive.

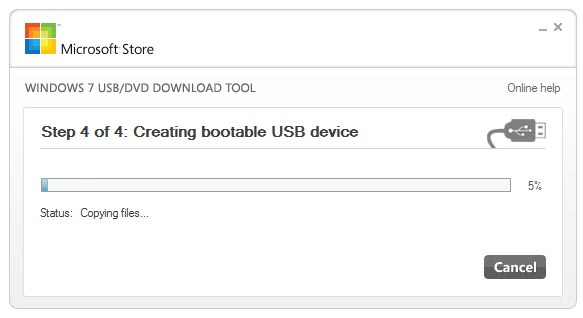
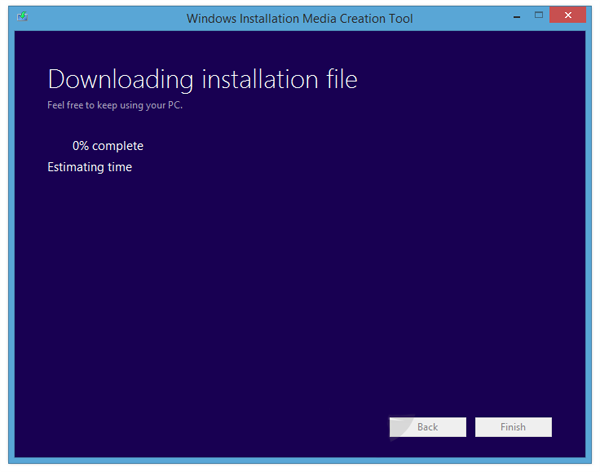
5. Now, the relevant files will be downloaded onto the device you specified and the device will be made bootable.

Screenshot-227

6. When you’re ready you can use the device to boot your computer and install Windows 8.1

Microsoft has done a commendable job making a useful and lightweight tool that does exactly what it promises with little confusion or headache. The process of downloading and installing the right version of Windows 8.1 as well as making a bootable drive has really never been easier. If you’re running Windows 8 and installing Windows 8.1 Pro, you’ll need a product key for the install. If you’re simply going from Windows 8 to 8.1 or doing a fresh install of Windows 8.1, you shouldn’t need a key.

-> Download the Windows 10 Pro ISO Without a Key From Microsoft

-> Create a Bootable USB Drive for Windows 8 / 8.1, Here’s How

Create a Bootable USB Drive for Windows 8 / 8.1, Here’s How

If you’ve never made a bootable USB device before, it’s simple and invaluable for doing quick installs and for troubleshooting OS problems. The age of discs, CD-ROMs, and DVDs has been largely replaced with cloud storage and flash drives. Many computers don’t even include disc drives anymore and having a bootable USB is essential for installing certain things. This process will help you both create and launch a bootable USB to install anything from Windows 7 to Windows 10 and is even applicable to installing Linux or other OSes.

1. Download Microsoft’s Windows USB/DVD Download Tool from this link. Once downloaded, install it.

2. You must have an ISO for the version of Windows you’ll be putting on the USB device. You can get it from MSDN and here if you have a product key. (You can also use the Windows Installation Media Creation Tool to download an ISO even without a key and also make a bootable USB)

3. Insert your USB device. Make sure it is 8GB or more and that it has been formatted or the contents backed up.

4. Start the Windows USB/DVD Download Tool.

1

5. Click ‘Browse‘ and navigate to the Windows ISO you want to place on the USB device.

6. Click ‘USB device‘ to have the tool install the ISO on your USB device.

2

3

7. Choose your USB device from the drop down menu. Be very careful to select the correct device (the one you most recently inserted) or you risk overwriting everything on it. To be sure, you should disconnect all USB drives you’re not using.

4

8. Now the tool will create the bootable USB device using the ISO file.

9. Once the process is finished, if you’re ready to install, leave the device plugged in and turn off your computer.

10. You’ll now need to set the BIOS to boot from USB. This process is different for each computer so do a quick search for your model to see how to enable booting from USB.

11. Now, once booting from USB has been enabled, when the computer starts it should find the bootable USB and you will be able to install Windows from the ISO.

That’s all there is to it.

-> How To Download The Windows 8.1 ISO Without a Product Key

Disable Twitter’s New Video ‘Autoplay’ Feature For iOS and Web

In a bid to increase the already rapid pace of media consumption, Twitter has decided that all GIFs and video clips should autoplay whenever they’re encountered. That means anytime someone posts a clip or GIF, whether it’s someone you follow or just while browsing, that clip will play and loop automatically. Not only is that a possible drain on your mobile data and battery, it can be distracting and downright annoying. It seems like we’re slowly moving back to the stone ages of the internet when fledgling webpages were filled with dozens and hundreds of flashing animated GIFs just for the sake of novelty. Luckily you can disable autoplay on both iOS and web viewing and it is so far absent on Android versions of Twitter. Follow these steps to disable autoplay.

Disable Autoplay On The Web

twitter-settings

1. Click your Twitter account icon. Then click ‘Settings‘.

twitter-autoplay

2. Scroll down to ‘Content‘. Then, under ‘Video Tweets‘ uncheck ‘Video autoplay‘.

3. Click ‘Save‘ and videos should no longer autoplay when viewed through the web.


Disable Autoplay on iOS

1. Launch the Twitter app.

2015_06_21_16.21.17

2. Tap the ‘Me‘ tab, then the gear icon, and then ‘Settings‘.

2015_06_21_16.21.51

3. Under ‘General‘, tap ‘Video autoplay‘. You can now choose to disable it entirely by tapping ‘Never play videos automatically‘ or force it to only play using WiFi and not 3G/4G to save some data.

IMG_0013

4. Save and exit. Videos should no longer autoplay through the iOS Twitter app.

It’s a very simple process to remove a feature that is sure to annoy many users. There could be those who like the feature however, and it’s easy to enable it again if you want a constant stream of Twitter clips. Like many features or changes that seem annoying at first, the more you use it the more you may find you come to like it. If you do happen to like an endless supply of video tweets, rejoice, for this is truly the golden age of such things.

Enable Galaxy S6 Edge Lighting Feature on Any Android Device

The recently released Samsung Galaxy S6 Edge has a very distinctive feature that sets it apart from all other Android phones. The display is curved so that it runs over the sides of the phone and this extra real estate is used as a notification bar and for additional interactivity. With ‘Edge Lighting’ you can use your phone as a handy alarm clock or set it to display different colors depending on who is calling you. It’s a pretty clever way to make use of that unused space and make phones more useful while sitting on a flat surface.

Of course such a dramatic new feature is bound to induce envy from other Android users who don’t have a curved display. So, developer Golgorz has created the next best thing with Edge Color Notifications, an app that emulates the ‘Edge Lighting’ display. Edge Color Notifications allows you to set lighting based notifications that show up on the sides of the phone. It obviously won’t actually go down to the edge since there is no screen there, but it can be quite visible if it’s bright enough and does a commendable job of bringing the feature to other Android devices.

19

The app has thoughtful settings that allow you to tweak the color, placement, and width of the notification lights. You can also choose whether to have the light on the left, right, or both edges of your phone. A few different animations for the lighting effect are available to choose from. A very useful feature is the ability to choose different color lighting for different contacts and apps. So if you can at a glance know which app the notification is for, or what type of call you’re receiving which makes the notifications infinitely more useful.

The app is still very new and has already received a few updates. The developer promises that it’s lightweight and won’t put much strain on the phone’s battery and memory. With more users giving it a try, it’s set to receive additional updates and tweaks. If you’re really itching to try out an Edge Lighting-esque feature, Edge Color Notifications might be for you.

Download Source: Edge Color Notifications for Android on the Play Store

How to transfer Your Flickr Photos to Google Photos

Flickr is a very popular image hosting and sharing platform. If you’ve been a user since the good old days when Flickr launched over a decade ago, you’ve likely built up quite a collection of photos. If you want to migrate your photos over to Google Photos, the process is relatively simple though there are a few extra steps involved. It can’t hurt to have an additional backup and Google Photos makes it easier to share and use your images with Google’s various services. Follow this procedure to transfer your Flickr library over to Google Photos.

1. Start by going to the Flickr website and logging into your account.

2. Go to ‘Camera Roll‘.

flickr-website-download

3. Now select the photos you want to download. You can click the top photo, then shift click the last photo to select every single photo you have. Alternatively you can select individual albums or sets of photos. Depending on how many you have, it might not be a good idea to download everything at once.

4. Once you’ve got your selection, click ‘Download‘. This will download your selection as a large .zip archive.

5. Once the download is complete, unzip the .zip file and you’ll have the uncompressed photos back on your device.

Now that you have your Flickr photos back on your computer, it’s time to set up Google Photos to upload them. The most reliable way to do that is to use the Google Photos Backup desktop app. We are repeating the same process which we cover in our previous tutorial for Dropbox.


1. Download and install the Google Photos Backup desktop app if you don’t already have it.

2. Log in to the app with your Google account.

google-photos-desktop-app-flickr-upload

3, Select the folders with images you want to upload to Google Photos. Uncheck all folders that you do not want to upload. For your Flickr photos, select the folder (or folders) you unzipped.

4. Choose ‘High quality‘ or ‘Original‘ for your photo uploads. ‘High quality‘ provides unlimited uploads but the image will be slightly compressed while ‘Original‘ will upload the uncompressed photo but will count towards your total data storage limit.

Now the Google Photos desktop app should begin uploading all the images you specified that were downloaded from your Flickr account. Once it’s complete, you should have a full backup of your Flickr photos if you’ve downloaded all of them. Then, they’ll be ready to use across all Google services. It’s always nice to have a backup of a backup and have your data available on multiple platforms.

Move Your Dropbox Photos To Google Photos

Dropbox is one of the most popular cloud storage apps and is amazing for keeping your data synced across multiple desktops and devices. It’s also excellent for data backup of photos and documents. If a file gets corrupted or deleted locally on a device, if the original is intact on the Dropbox servers, you’ll always have access to it. Google Photos is also great for nearly unlimited storage of your digital memories and data. If you have a large number of photos saved in Dropbox that you’d also like to backup to Google Photos, it’s a simple process. Just follow these steps to sync and move your photos to Google Photos.

dropbox-selective-sync-desktop-app

1. Download and install the Dropbox desktop app.

2. Start the desktop app and log in with your Dropbox account.

3. Go to app preferences, then ‘Account‘ and then ‘Selective Sync‘.

4. Now select those folders that have photos in them, uncheck folders that don’t contain any images. (This is assuming you only want to transfer your photos and will save time downloading data to the desktop.)

5. The photos will begin downloading to your desktop.

Now you’ll also need to set up the desktop version of Google Photos to forward the Dropbox photos.

google-photos-backup-dropbox-folders

1. Download and install the Google Photos Backup desktop app.

2. Start the app and log in with your account.

3. Go to ‘Settings‘, then ‘Desktop folders‘, then ‘Add‘.

4. You can choose the top ‘Dropbox‘ folder to upload every photo or you can choose individual folders whose photos you want to upload.

5. Select the image quality to upload. ‘High Quality‘ allows for unlimited images up to 16MP with compression while ‘Original‘ will store the uncompressed version but count towards your total Google Drive storage.

6. Click ‘Ok‘ to begin uploading to Google Photos.

With that set up, your desktop should be downloading all specified photos stored on Dropbox while Google Photos uploads them to Google’s servers. It’s a pretty convenient relay system with minimal effort. You just need to wait and depending on the number of photos and your internet speed, everything should be synced fairly quickly. Once you verify that all the images have been uploaded, you’re free to remove either app if you don’t want to continue syncing or you can continue to use them for future downloads and uploads.

-> How to transfer Your Flickr Photos to Google Photos