The 5 Best Translation Apps for Android and IOS

People have wanted mobile universal language translators for centuries. Although the technology has been a long time coming, it is steadily and rapidly improving in accuracy, speed, and the number of languages that can be translated. The power of mobile devices and cloud storage allow for apps that can translate from both text and voice input, in real time, and even translate from images of text. These capabilities are set to improve even more noticeably in the coming years but they have finally reached the point where they’re more available and useful than not. Try these 5 recommended translation apps out whether you’re a language student, traveler, or just curious.

1. Google Translate

Google-Translate-1024x640

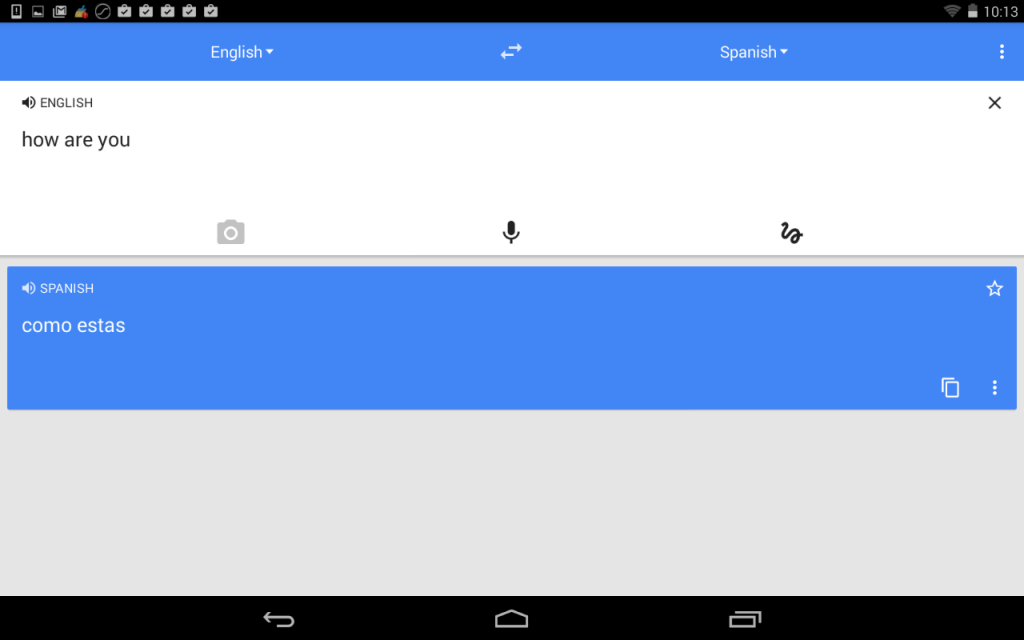
Google Translate is one of the biggest names out there in translation apps. It has full support for two way translation using text and voice, offline use by downloading language packs, and can even translate and overlay text in real time using your device’s camera. This last feature is a specialty of Google Translate and lets you read foreign languages displayed via augmented reality on your smartphone or tablet. It’s an impressive and futuristic feature that you need to experience to believe.

Source: Android, iOS (Free)

2. iTranslate

iTranslate-1024x640

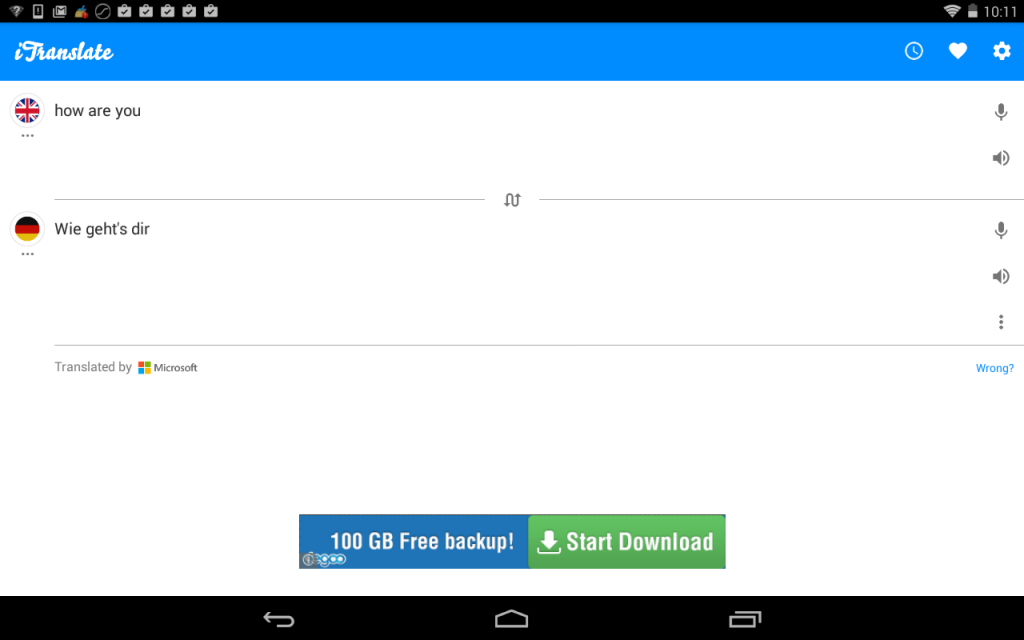
iTranslate also allows for full two way translation between languages via voice and text input. The app also makes a point to include varying dialects and word meanings to capture some of the nuance that is so important to properly understanding foreign languages.

Source: Android, iOS

3. Speak & Translate

Speak-Translate

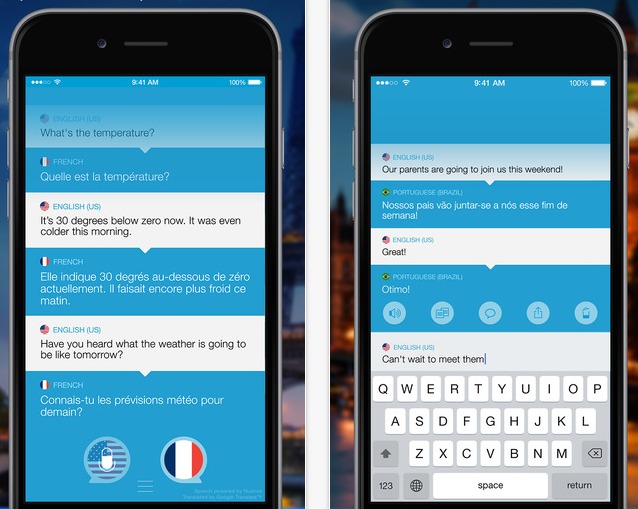
This app is for iOS only but is highly recommended for its clean and intuitive interface, support for over 100 languages, and excellent sharing capabilities between Apple devices like the iPhone and iPad. Like the other apps, you can perform translations with text and voice input and the interface makes it easy to have conversations or share translations with others.

Source: iOS (Paid $9.99)

4. Voice Translator

Voice-Translator-1024x640

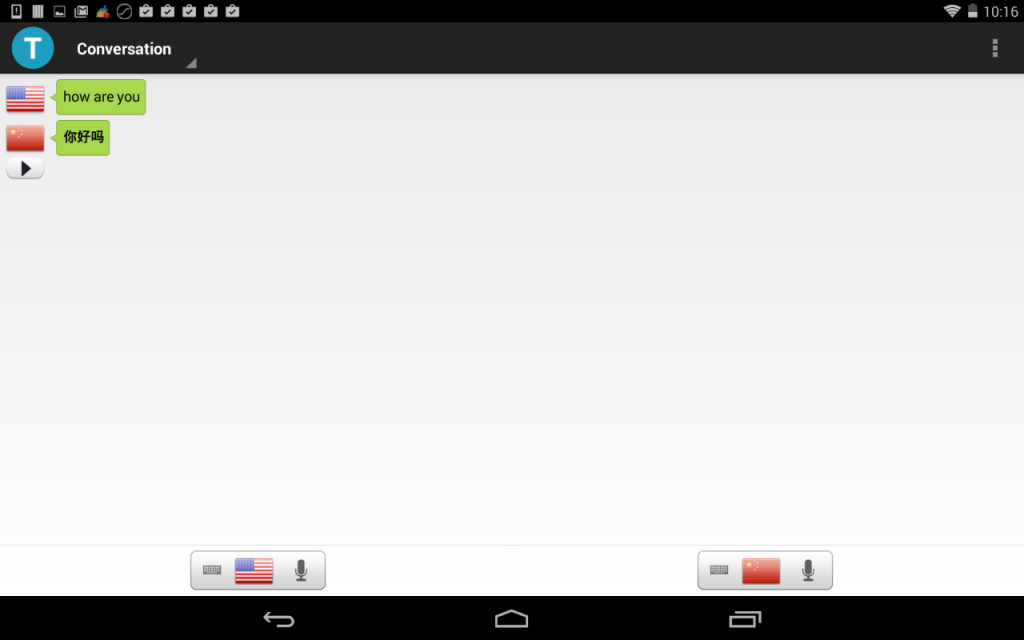
Voice Translator is for Android only and does away completely with text input. This is great for those who don’t want to bother with typing or who want to practice a lot of speaking. You can speak and have your words instantly translated and even read aloud back in the foreign language. The app supports simultaneous translation of multiple languages at once which is a fun feature that many apps don’t have.

Source: Android

5. Yandex.Translate

Yandex.Translate-1024x640

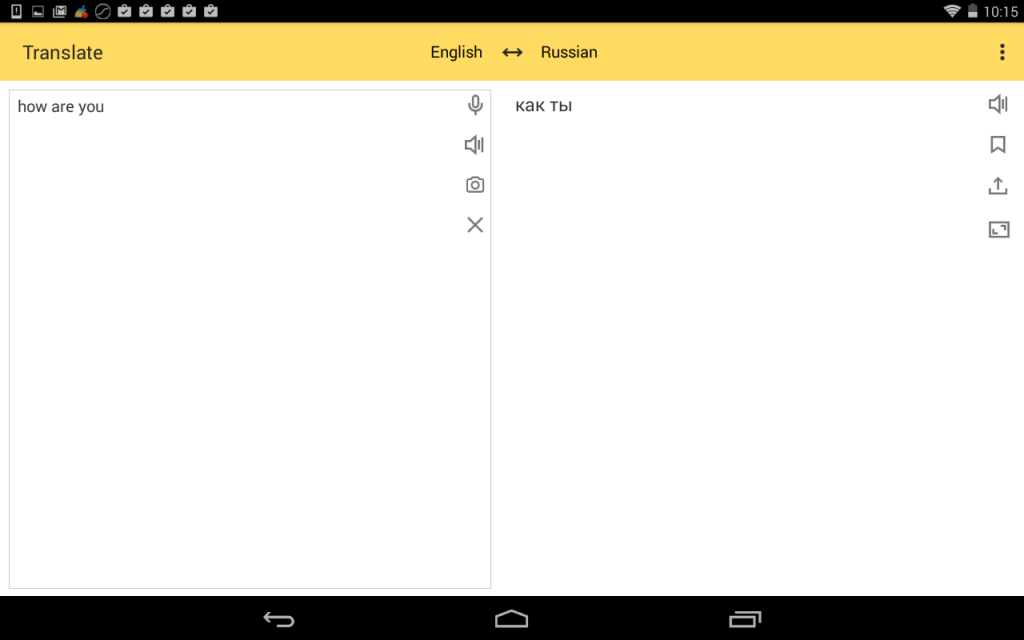
This app is made by the Russian search giant Yandex and has many of the same features present in Google Translate. The app supports dozens of languages, offline support by downloading dictionaries, voice and text input, and real time translation of text from images.

Source: Android, iOS (Free)

Use Your Own Image Slideshow For Your Windows 10 Lock Screen

Windows has had the slideshow screensaver option for a while but now in Windows 10 you can set a custom slideshow as a replacement for your lock screen. There is more control than ever over how the slideshow behaves and when it is activated to save power and resources. You can also specify a folder of images that will be used for the slideshow instead of Windows just randomly pulling images from your Photos or elsewhere. To set a folder as your lock screen slideshow, just follow these steps.

win10-lockscreen-slideshow

1. Open Settings from the Start Menu, then select Personalization. On the left, select ‘Lock screen’ and then click the box below Background and select Slideshow.

2. Next, click ‘Add a folder’ under the ‘Choose albums for your slideshow’ text. You can now browse for and select the folder containing the images you want to use for your slideshow. The images must all be in PNG format so make sure to convert any non-PNG files to PNG if you want them to be displayed. Also keep in mind that all images in the folder will be displayed so make sure you don’t have any stray images that don’t belong.

slideshow-settings-lockscreen

3. After adding a folder, you can access more customization by clicking ‘Advanced Slideshow settings’ below. In this menu you can change a variety of settings to manage how the slideshow is displayed. You can toggle whether or not to include Camera Roll photos, use photos that won’t fit your screen, disable the slideshow when on battery power, set the lock screen to show instead of turning off the display, and set how long the slideshow runs before the screen turns itself off.

With the increase in control and features for the lock screen slideshow, it moves from being a rarely used curiosity to something that many more people might enjoy. The controls for saving power and flexibility in controlling what images are displayed makes the slideshow feature much more intuitive and useful.

Create A Custom Details View In File Explorer

File Explorer is one of the most commonly used features in Windows and lets you easily browse all of your folders, directories, files, etc. all with a few clicks. Everything is presented neatly in windows and that makes copying, moving, and other operations very simple to accomplish with a mouse. What many users don’t know is how much more File Explorer has to offer in terms of organizing your files. Of course you can view folders and files as simple icons and swap them about but this can get mightily confusing if you start to have hundreds of folders and never organize them or their contents.

sortcolumns-100612575-large

One of the best ways to quickly sort and organize folders is by using Views in File Explorer. Once you have a File Explorer window open and are in a folder or directory, you can click View near the top to change the way the folder is presented. You can show icons of varying size, tiles, a list, or perhaps the most useful of all, a Details view with even more control. After selecting a Details view, several tabs will appear that let you quickly sort the contents by Name, Date Created, Date Modified, Size, and file type among other options. This is a powerful organization and management feature and can save a ton of time and make it easy to unclutter a folder.

One extra trick you might not be aware of is that you can manually change the order of the details in the view. If you prefer to have the file’s size displayed before the date it was created for example, simply click and drag the ‘Size’ tab over to where you’d like it to be ordered. This will work for any of the categories so you can create any order of details in the view you want.

Even better, once you have a details ordering that you like, you can create a template and use this same view display for any other folder you want. Here are the steps to accomplish just that.

1. Find the folder with the details view that you’ve customized and want to apply to other folders, then right-click it and select Properties. Then click the Customize tab near the top of the menu.

folderoptions2-100612577-medium

2. Under ‘Optimize this folder for:’ select ‘General items’. Check the box below that reads ‘Also apply this template to all subfolders’. Then click Apply and OK.

3. You will need to make sure that the details and view is set up the way you like it. Selecting ‘General items’ resets the ordering so you will need to recreate it now.

4. After your ordering is restored, click View, then Options on the right, then ‘Change folder and search options.’

folderoptions1-100612581-medium

5. Now click the View tab in the window that appears, and then click ‘Apply to folders’ and finally click ‘Yes’ to confirm that you want to apply the changes.

6. To make other folders use this template, simply right-click them, go to Properties, then Customize, and then use the same ‘General items’ template.

7. To set the ordering back to the default for a folder, open it and click View, then Options on the right, then ‘Change folder and search options’. Then click the View tab, and finally click Reset Folders.

Encrypt And Password Protect ZIP Files

The ZIP format is incredibly popular and useful for data compression and archiving. Most people have downloaded and sent hundreds of .zip files which can then be uncompressed without any data loss. Files compressed into the .zip format are also ripe for encryption as they can frequently contain an archive of important data to be shared. Though many people are either unaware of or don’t care to use encryption on .zip files, it’s another useful tool in case you ever need to send sensitive or private data. Archives compressed to .zip can also be password protected. The password is needed to decrypt the archive so its contents can be read.

0825-error-message-100599330-medium

The .zip file format supports two basic kinds of encryption. The first, called ZipCrypto is considered to be rather weak and easy to crack. Anyone who really wanted access to the data would find it easy to break this encryption and read the entire contents of the archive. The second, AES-256 is much more robust and if a suitable password is used, is nearly impossible to break. Unfortunately, the .zip tool in Windows does not support AES-256 so you will need to use another third-party tool like the popular 7-Zip to properly encrypt and password protect archives.

0825-7-zip-encrypt-100599346-large

Encrypting and password protecting a folder or file with 7-Zip is incredibly easy. Simply download and install the proper version of 7-Zip for your OS. Then right-click the file or folder you want to compress into the ,zip format, mouse or hover over the ‘7-Zip’ in the menu, then select ‘Add to archive…’. In the window that appears, you’ll notice an area on the lower right for Encryption settings. Simply enter a password twice, then select ‘AES-256’ from the dropdown menu under ‘Encryption method’. Finally, you can adjust other settings for the archive and change its name and click ‘Ok’ to create it.

Now when you want to unzip and decrypt the archive, 7-Zip will ask for the original password used to encrypt it. Once provided, the archive will be decrypted and unzipped and the original contents will be there. One problem with this approach is that the file names and formats are still all visible within the archive even if it hasn’t been decrypted. If you’re concerned with that, you can change the names and formats temporarily and provide additional information for whoever needs to decrypt the files to change the names and formats back.

Set Up And Use Your Android Wear 1.3 Smartwatch With The iPhone

With the enormous iPhone user base and the Apple Watch being the only available option for smartwatches, Android Wear users had to either buy a pricey Apple Watch or have an Android device to use their smartwatch. Surprisingly enough, Google pushed hard to secure a deal with Apple to allow Android Wear to communicate with the iPhone and allow near full smartwatch functionality. Of course Google also put in the hard work to develop the Android Wear app for the iPhone. That hard work has paid off and resulted in an impressive suite of interactivity between Android Wear smartwatches and the iPhone. It’s also extremely easy to pair the two, just follow these steps.

1. To begin you’ll need the following:

  • An Android Wear smartwatch running Android Wear version 1.3 or later.
  • An iPhone 5 or later running iOS 8.2 or later.
  • The Android Wear for iOS app installed on your iPhone.

2. Reset your Android Wear watch to its factory settings. Hold down the side button until the menu appears. Scroll down to Settings and tap it, then find Factory Reset and tap it. Now tap the green icon that appears and the reset will begin.

Android-Wear-iOS-1

3. Download and install the Android Wear for iOS app from the App Store. Launch it on your iPhone and tap the blue arrow button to begin setup.

Android-Wear-iOS-2

4. Choose whether or not to allow Google Fit to access your watch data.

Android-Wear-iOS-3

5. Next choose your Android Wear watch from the list of nearby Bluetooth devices. You’ll need to have Bluetooth turned on for both your iPhone and Android Wear watch and the watch must be discoverable.

Android-Wear-iOS-4

6. Check the code displayed on your Android Wear watch once the pairing process begins. Enter the code you see into the Android Wear app on your iPhone and then tap Pair to complete the pairing.

Android-Wear-iOS-5

7. Once the pairing is successful, follow the additional instructions to configure how your iPhone and watch will exchange and display data. Your Android Wear watch should now function nearly like a native smartwatch for iOS and the iPhone! You can receive notifications, perform voice searches, use fitness tracking, etc. all using your Android Wear watch and the iPhone.

This is definitely an impressive feat by both Apple and Google and will surely help wearables and smartwatches gain acceptance and users.

Using File History feature With Windows 10

The unassumingly named File History feature lets Windows 10 save periodic backups of your files. Not to be confused with the feature that tracks your recently opened files, File History is a dedicated backup service that many users either aren’t even aware exists. It can be of great help when it comes to simple backup tasks, saving your work, retrieving older versions of files, recovering deleted files and more. Backing up files is not only necessary for a work or professional environment, it’s a good idea for almost anyone and can get you out of trouble more than a few times when used correctly. To start using File History, just follow these steps.

filehistory1

1. Begin by opening Settings from the Start menu, then click Update & Security. Once inside Update & Security, click on Backup on the left.

filehistory2

2. Now you will see an option called ‘Add a drive’ next to a button with a plus symbol. You will need to have an external storage device connected or will need to connect one at this point. Click the ‘plus’ button to add the drive you want to store your backed up files to. A prompt will appear and you can select the external drive to use with File History. Once complete, your files will automatically be backed up to this external drive and a slider switch will appear so you can choose whether or not these backups occur automatically.

filehistory3

3. Windows 10 starts by backing up all folders in the Users directory.  Clicking ‘More options’ below the ‘Automatically back up my files’ switch will let you access many more controls to adjust how File History handles your backups. Inside ‘More options’ you can add additional folders by clicking the ‘plus’ button, remove folders by clicking them and then clicking the ‘Remove’ button below, and create a list of folders to exclude from backups. You can also change the external drive where the files are saved and you can set how often you’d like backups to be made. By default, backups are made every hour. You can also set how long to keep your backed up files so that older ones can be removed to make room for more recent backups or for security and privacy reasons.

4. After setting up File History and with your backup drive connected, you can easily access stored earlier versions of files. Inside File Explorer, just right-click any file and click Properties. Then near the top of the Properties window, click the Previous Versions tab. You’ll be presented a list of all backed up versions of that file that you can open. It’s a thoughtful and very useful feature.


File History is a great feature and Windows 10 has made it easier than ever to set up and use properly. With it you can gain confidence that your files are saved, exert a fine degree of control over how files are backed up, and even have access to previous versions.