There are several reasons you might want to clone a hard drive. You can create a full backup of any hard drive that can then be copied to a new hard drive for use with a new system. Cloning is also excellent for upgrading your existing hard drive to a higher capacity one without losing all of your files and settings. Of course cloning a drive is always a great backup measure as well in case something ever goes wrong with your system or you have very important files on it. Macrium Reflect Free is an elegant tool to accomplish hard drive cloning and is easy to use and highly reliable. Follow this procedure to use Macrium Reflect Free to seamlessly clone any hard drive to another one.

1. Before you begin, you will probably want to create a full backup of your existing hard drive that will be cloned. It’s also a good idea to have rescue media to fix any potential problems that can crop up. It just so happens both of these tasks can be performed in Macrium Reflect Free.
2. If you’re ready to begin, make sure you have the drive to be cloned, a secondary drive of equal or greater capacity where the cloned data will be stored, and Macrium Reflect Free downloaded and installed.
3. Now connect both drives to your computer. You will need enough power and SATA connectors to connect two drives at once.
4. Run Macrium Reflect Free and click the Disk Image tab to display all connected drives.
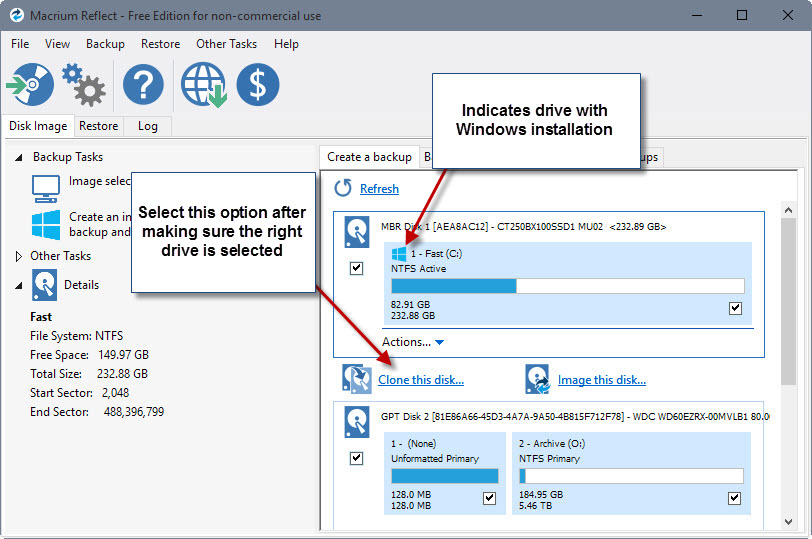
5. Select the drive you want to clone (copy over) to the new drive. Below it, click “Clone this disk…”.
6. Now click “Select a disk to clone to” and select the secondary drive that will hold the cloned data. Be careful to select the correct disk here as the secondary drive will have all data removed during the cloning process.
7. Adjust the partitioning on the secondary drive now. You can either make a single large partition of the entire drive or select part of it to hold the cloned data. If you want to use the whole disk just select “maximum size”.
8. The original drive will now be cloned to the secondary drive. Depending on how much data is being transferred, this could take some time so be patient.
9. When the process is done, connect the secondary drive to your system and attempt to boot from it. If the procedure worked, all of your data and system configuration from the original disk should appear on the secondary one as if it were the original.
Enjoy your cloned hard drive!