Guide To Downgrading Windows 10 to Windows 8.1/7

The Windows 10 launch has been quite successful and the majority of users are very pleased with their free upgrades. There are some users who have encountered problems and understandably want to downgrade their system to a previous version of Windows. This can be due to incompatibilities with certain PCs and hardware, little bugs that have not been ironed out, or simply preferring an older version of Windows. If you do need or want to downgrade, thankfully Microsoft has provided the option and you can do so easily through Windows 10. It just takes a few clicks to restore your previous version, provided you didn’t manually remove it to free up some space. Follow this guide to restore your system to either Windows 8.1 or Windows 7.

settings-windows-10

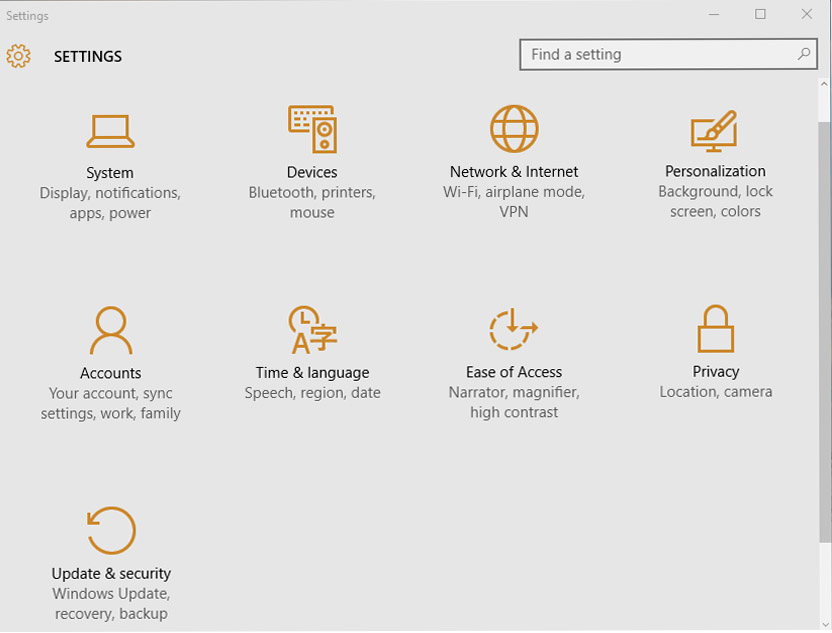
1. In Windows 10, go to your Settings. You can launch it quickly with ‘Windows + I’.

windows-10-recovery

2. Now, click ‘Update & security’.

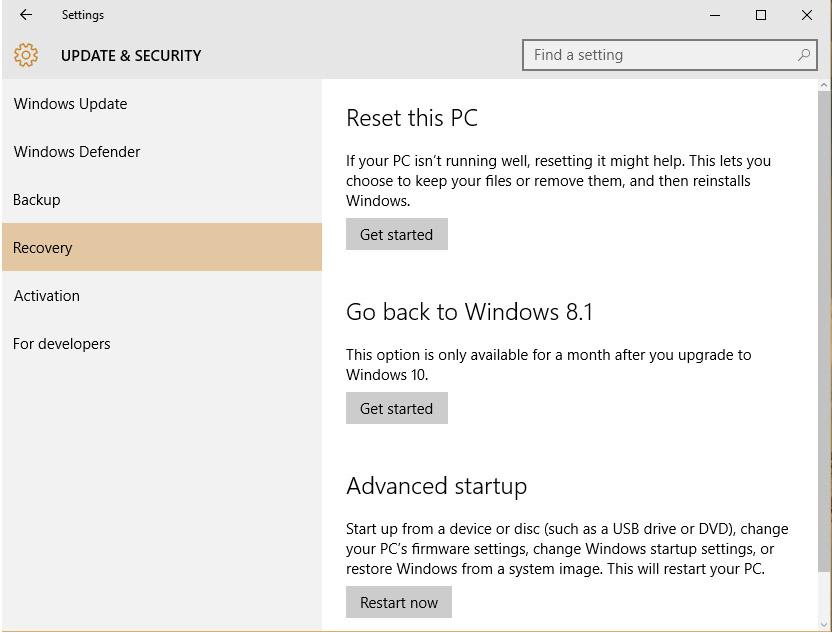
3. On the left under Recovery, you will be presented with an option called ‘Go back to Windows 8.1’ or ‘Go back to Windows 7’ depending on your previous version. Click the ‘Get started’ button below.

4. You can enter some feedback to tell Microsoft why you’re downgrading and then click ‘Next’ to continue.

5. Now proceed to follow the instructions onscreen and click through to allow Windows to revert to its previous version.

Once complete, you should be back to your older version of Windows as if you never upgraded in the first place. All your files and folders will remain intact and you can also choose to upgrade again if you like. Remember that you must do so within the 1 year period that Microsoft has allowed for free upgrades, otherwise you will need to pay.

This will hopefully resolve any issues that might have been present with Windows 10. You can always wait a little while and see if your compatibility issues or otherwise have been corrected and attempt the upgrade again. In the meantime, enjoy your trusty previous Windows version.

Recover Some Disk Space Following An Upgrade to Windows 10

After upgrading from a previous version of Windows to Windows 10, you’ll have a significant number of leftover files that take up space on your hard drive. These are left in place to make the upgrade faster and to allow for the possibility of downgrading back to the previous version of Windows. If you want to recover this space, you can delete these files and get the space back. Follow these easy steps to free up some space on your hard drive.

1. Important: Do NOT do this if you ever want to revert to your previous version of Windows as this will remove those files. If you like Windows 10 and everything is working, there is really no reason to keep these files so you can safely continue.

disk-cleanup-tool

2. Inside Windows 10, enter a search for ‘Disk Cleanup’, a built-in utility app and launch it.

disk-cleanup-for-windows-disk


3. In the Disk Cleanup window, on the bottom left is an Administrator button called ‘Clean up system files’. Click this button.

4. You’ll now be shown a list called ‘Files to delete’. You can select the entries called ‘Previous Windows installation(s)’ and ‘Temporary Windows installation files’. Then click ‘OK’.

5. The files will be removed and the space they were using will be made available again.

That’s all there is to it. The space you get back will vary slightly but should be quite a few gigabytes. If you have a very large drive, there is little harm in leaving the files there. By removing them, you do also remove any future ability to revert to a previous version of Windows. For the majority of users, this will never be needed and Windows 10 should suffice for many years to come. If you really want those extra gigabytes back or your hard disk space is limited, this can be a very useful tip to recover that space and have a cleaner Windows 10 installation.

Guide to Upgrading to Windows 10 From Windows 7

Windows 7 has been a tried and true OS for years and many users have even held onto it to avoid the often criticized Windows 8/8.1. With Windows 10 here and addressing many of the issues that plagued Windows 8, it’s no surprise many Windows 7 users are considering the free upgrade. You can enjoy a number of new features as well as a modern and more future proof OS. Upgrading is surprisingly easy and takes just a few steps and some patience. Read on to find out how to easily upgrade from Windows 7.

1. Before you begin, check if your copy of Windows is activated to avoid any problems after the upgrade. Right-click on your My Computer icon or on Computer in the Start menu and then select Properties. Under ‘Windows activation’ it will indicate if it’s activated.

2. Back up all of your most important files. The upgrade will preserve everything but it’s always better to have a backup in case something goes wrong.

3. Download and launch the Media Creation Tool. This tool lets you make a bootable USB or DVD as well as directly upgrade on your computer.

win7-win10-upgrade-0

4. Select ‘Upgrade this PC now’ to start the upgrade process without making a bootable USB or DVD.

5. The tool will begin downloading the Windows 10 files. The files are large so this will take several hours at least. You can continue to use your PC but do not disturb the download window.

win7-win10-upgrade-5

6. Once the download is done, the tool will begin preparing the installation. You will be asked if you want to search for updates. You can skip the updates and perform them after the install or search for them at this time.

win7-win10-upgrade-8

7. Now, after a few more windows you’ll be asked to accept the License terms, click ‘Accept’.

win7-win10-upgrade-3

8. Now you can choose to keep your existing apps and files or you can delete everything and have a clean install. Be very careful here to select ‘Keep personal files and apps’ if you don’t want everything to be deleted.

win7-win10-upgrade-11

9. Your PC will install various files and restart several times and then you can enjoy your newly upgraded Windows 10 PC.

Helpful Keyboard Shortcuts in Windows 10

Along with some of the newer features in Windows 10 comes a host of new keyboard shortcuts to go  with them. Sometimes a few keystrokes is faster and more accurate than doing the same action with a mouse or touchpad. While it might take a little practice to learn them, keyboard shortcuts will eventually become second nature and improve your overall experience. Here are some of the most useful keyboard shortcuts and what they can do.

Window Snapping

With Window Snapping you can have up to four different windows onscreen at a time, conveniently designated to different halves or quadrants of the screen. It’s very useful for working on different apps or data simultaneously if you need it all in view.

Windows Key+Left — snap current window to the left.

Windows Key+Right — snap current window to the right.

Windows Key+Up — snap current window to the top.

Windows Key+Down — snap current window to the bottom.

Virtual Desktops

1362034511226907715

Virtual Desktops lets you have multiple “desktops” each with any number of open windows and apps that you can switch between. It’s also potentially very useful for work in which you want separate environments but access to all of them at once.

Windows Key+Ctrl+D — create a new virtual desktop.

Windows Key+Ctrl+Left — scroll left through virtual desktops.

Windows Key+Ctrl+Right — scroll right through virtual desktops.

Windows Key+Ctrl+F4 — close the current desktop.

Windows Key+Tab — view all virtual desktops in the Task View page.


Cortana

1362034511280694595

Cortana is Microsoft’s new digital assistant and can answer your questions via voice or text input.

Windows Key+Q — open Cortana for voice input.

Windows Key+S — open Cortana for text input.

Windows Key+I — open the Windows 10 settings pane.

Windows Key+A — open Windows 10 notifications

Windows Key+X — open the Start menu


Command Prompt

1362034511335785795

With the command prompt, you can access detailed system functions and perform diagnostics and maintenance. To allow for shortcuts while in the Command Prompt, right-click the top of the window, click Properties, then in the Options tab uncheck ‘Use legacy console’, enable Ctrl shortcuts, and enable the text selection options. This is a great feature for anyone who has had to type in lengthy and obscure commands. Now you can just copy and paste with the same text keystrokes.

Shift+Left — highlight text to the left of the cursor.

Shift+Right — highlight text to the right of the cursor.

Ctrl+Shift+Left (or Right) highlight a block of text.

Ctrl+C — copy selected text to the Windows clipboard.

Ctrl+V — paste text from the Windows clipboard.

Ctrl+A — select all text after the prompt.


Classic Helpful Shortcuts

Windows Key+Home — minimize all windows except the active one.

Windows Key+L — lock your PC and go to the lock screen.

Windows Key+E — launch Windows Explorer

Alt+Tab switch between windows.

Alt+F4 close the current window.

Ctrl+Shift+Esc — open Task Manager.

Windows Key+R — open the Run dialog box.

Shift+Delete — delete files without sending them to the Recycle Bin.

Alt+Enter — show the properties of the currently selected file.

Windows Key+PrtScr — take a screenshot saved to your Pictures folder.

Windows Key+plus — zoom in using the Magnifier utility.

Windows Key+minus — zoom out using the Magnifier utility.

Disable Or Uninstall OneDrive In Windows 10

OneDrive is Microsoft’s cloud storage platform and lets you sync data across many devices. You can upload and download a variety of data and set OneDrive to automatically back up everything to the cloud. While some might find this a wonderfully beneficial feature, it does introduce some security concerns, especially on shared devices. You might also just prefer a different cloud storage platform or not like cloud storage in general. By default, OneDrive is enabled all the time in Windows 10. However, it is easy to either disable the app from running or delete it entirely. Follow these steps if you choose not to use OneDrive.

Disable OneDrive Via The Registry Editor

1. Hit Windows Key + R to launch the Run dialog box.

2. Enter ‘RegEdit.exe’ and then click ‘Ok’ or hit the Enter key to open the Registry Editor.

3. Find the registry entry called ‘HKEY_LOCAL_MACHINE\Software\Policies\Microsoft\Windows’.

4. Right-click Windows and select New, then Key. Name the new key ‘OneDrive’.

5. Right-click the OneDrive key and select New, then DWORD (32-bit) Value. Name this ‘DisableFileSyncNGSC’.

DisableFileSyncNGSC

6. Set the data value for ‘DisableFileSyncNGSC’ to 1.

7. Close the Registry Editor and restart your PC.

Uninstall OneDrive Completely

If that process doesn’t work, you can also just uninstall OneDrive and all of its components very easily. You can always download OneDrive again if you want it. This process will remove the OneDrive app so it won’t upload any data and you won’t be able to download any of your OneDrive data on that device.

1. Open a Command Prompt with Administrator privileges.

2. Enter ‘taskkill /f /im OneDrive.exe’ to stop OneDrive if it is running.

uninstall-ondrive-system32

3. For the 32-bit version, enter ‘%SystemRoot%\System32\OneDriveSetup.exe /uninstall’.

uninstall-ondrive-system64

4. For the 64-bit version, enter ‘%SystemRoot%\SysWOW64\OneDriveSetup.exe /uninstall’.

5. Run the following commands to clear old OneDrive folders:

‘rd “%UserProfile%\OneDrive” /Q /S’

‘rd “%LocalAppData%\Microsoft\OneDrive” /Q /S’

‘rd “%ProgramData%\Microsoft OneDrive” /Q /S’

‘rd “C:\OneDriveTemp” /Q /S’

6. You can also remove the following registry entries:

‘REG Delete “HKEY_CLASSES_ROOT\CLSID\{018D5C66-4533-4307-9B53-224DE2ED1FE6}” /f’

‘REG Delete “HKEY_CLASSES_ROOT\Wow6432Node\CLSID\{018D5C66-4533-4307-9B53-224DE2ED1FE6}” /f’

The 5 Best Features of Windows 10

Windows 10 has quite a few substantial changes, especially when compared to the much maligned Windows 8. With Windows 8, Microsoft tried hard to blend desktops, tablets, and mobile devices but ended up frustrating users of all of them by making odd concessions like removing the beloved Start menu from the Windows 8 desktop environment. Luckily Microsoft has learned their lesson the hard way and Windows 10 is actually the biggest and most ambitious launch for Microsoft perhaps ever. It’s so big in fact that Microsoft skipped Windows 9 and jumped straight from 8.1 to 10. Here are 5 of the best and brightest reasons to upgrade to Windows 10.

1. Start Menu

windows-10-start-menu

Yes, it’s back and better than ever. For some reason, Microsoft thought that people would like having a strange tablet-like experience on their new Windows 8 desktops and removed the Start menu that was so familiar to users of Windows products for decades. The trusty Start menu allows you quick access to apps, utilities and documents and it’s a wonder that it was removed completely. Thank your lucky stars it makes well-deserved reappearance in Windows 10 where it will be instantly familiar to anyone upgrading from Windows 7 and below.

2. Edge Browser

microsoft-edge-browser

Edge is Microsoft’s brand new browser meant to compete with the popular Chrome and Firefox browsers that largely replaced their awful Internet Explorer. Using Internet Explorer was slow, painful and it was riddled with security problems. Edge is new, fast, clean and a worthy competitor to any modern browser. It’s likely to win more than a few fans and new Windows 10 users over.

3. Cortana

cortana-desktop

She might have first appeared as Master Chief’s assistant in the wildly popular Halo series, but now she lives in many a Microsoft device as a helpful digital assistant. Cortana is Microsoft’s response to Apple’s Siri digital assistant and she’s every bit as helpful. Cortana responds directly to your voice and can help with searches, appointments, etc. and act as a great help in this busy digital world.

4. Continuum Mode

continuum-mode

Continuum Mode is a cleverly designed way to switch between the difference interfaces available on tablets, desktops, and other devices. These devices have varying sizes, aspect ratios and inputs so why force them to share a single interface style? It’s much better and convenient to allow users to seamlessly switch between them, especially on hybrid devices that would benefit the most from fast  interface swapping.

5. It’s Free!

Microsoft has often been abbreviated to M$ by jaded users who rightfully felt at times that Microsoft only wishes to squeeze every last penny from them with minor upgrades. Well Microsoft responded by making Windows 10 entirely free, not only to recent buyers of newer devices but even older users on Windows 7 and Window 8. It was a bold move and is sure to delight both loyal Microsoft users and those new to the world of Windows.


-> Force Upgrade to Windows 10

-> Download the Windows 10 Pro ISO Without a Key From Microsoft