Pin Your Favorite Sites To Your Windows 10 Start Screen

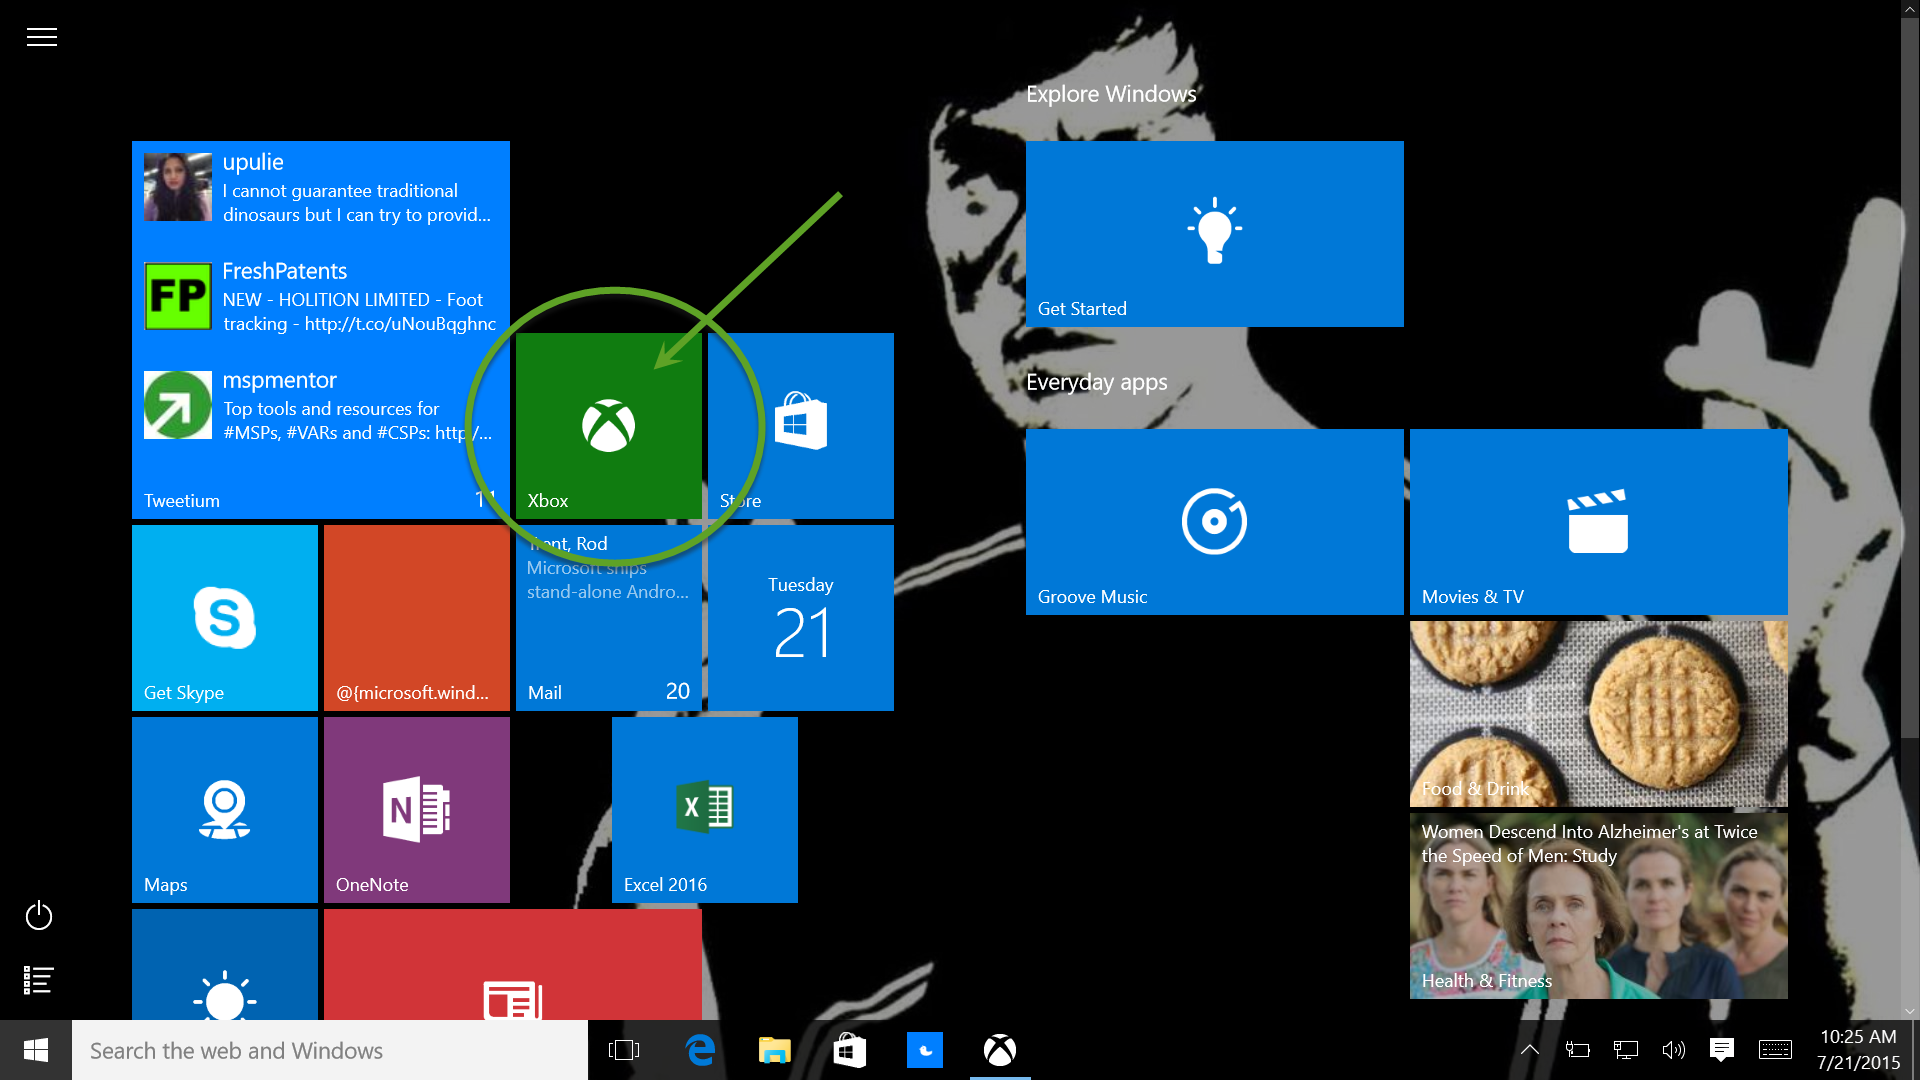
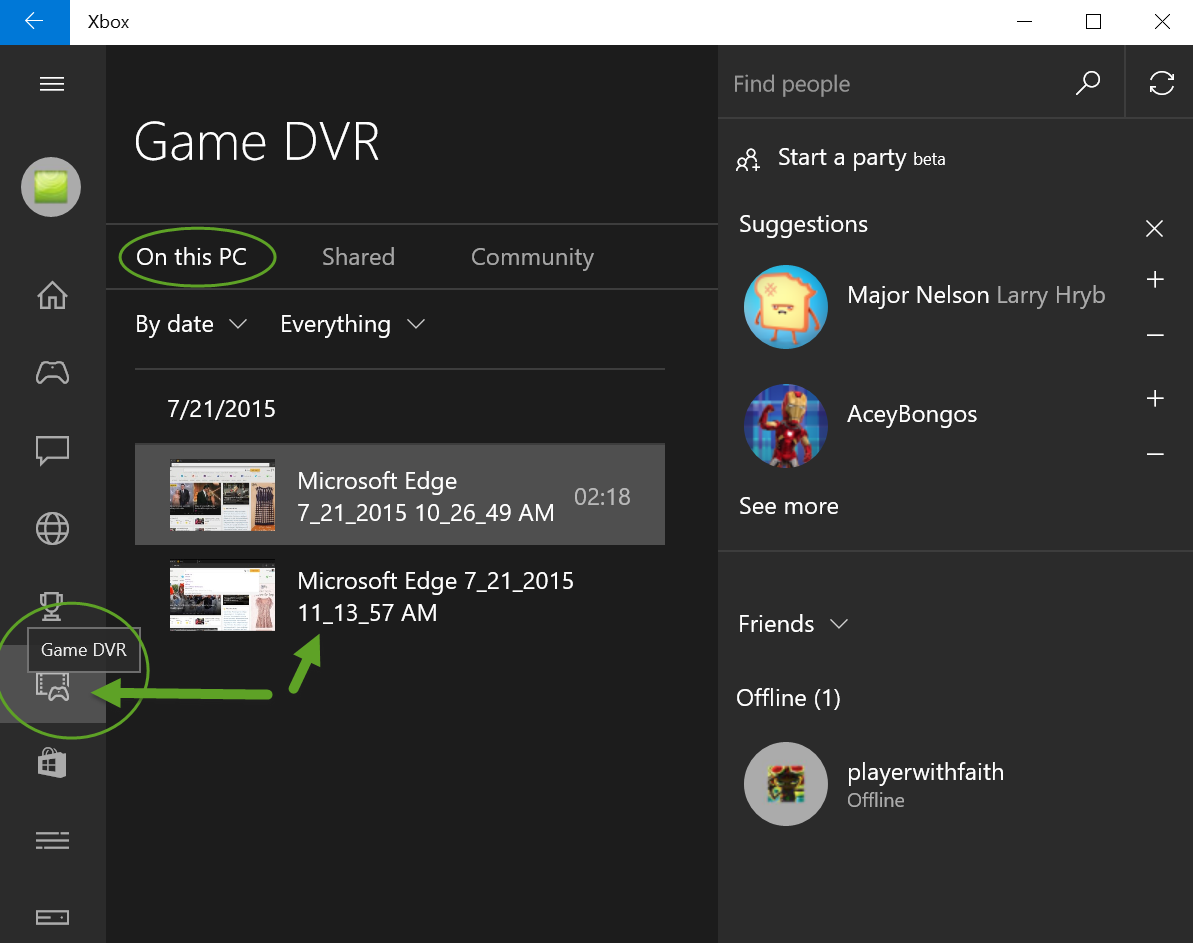
We probably all have certain websites that we visit so often, you might as well have a permanent and fast way to access them. In Windows 10, this is best accomplished by pinning a link to the site on your Start Screen. It’s a lot like have a desktop shortcut but instead it opens a link to that site in your browser. A big part of Windows 10 is Microsoft’s fully overhauled Edge browser which promises to put up some actual competition with the likes of Firefox and Chrome. Edge makes it extremely easy to browse to your favorite sites and then pin them to the Start Screen for instant access at any time. Just follow these quick steps to create a new pinned site.

ms-edge-browser

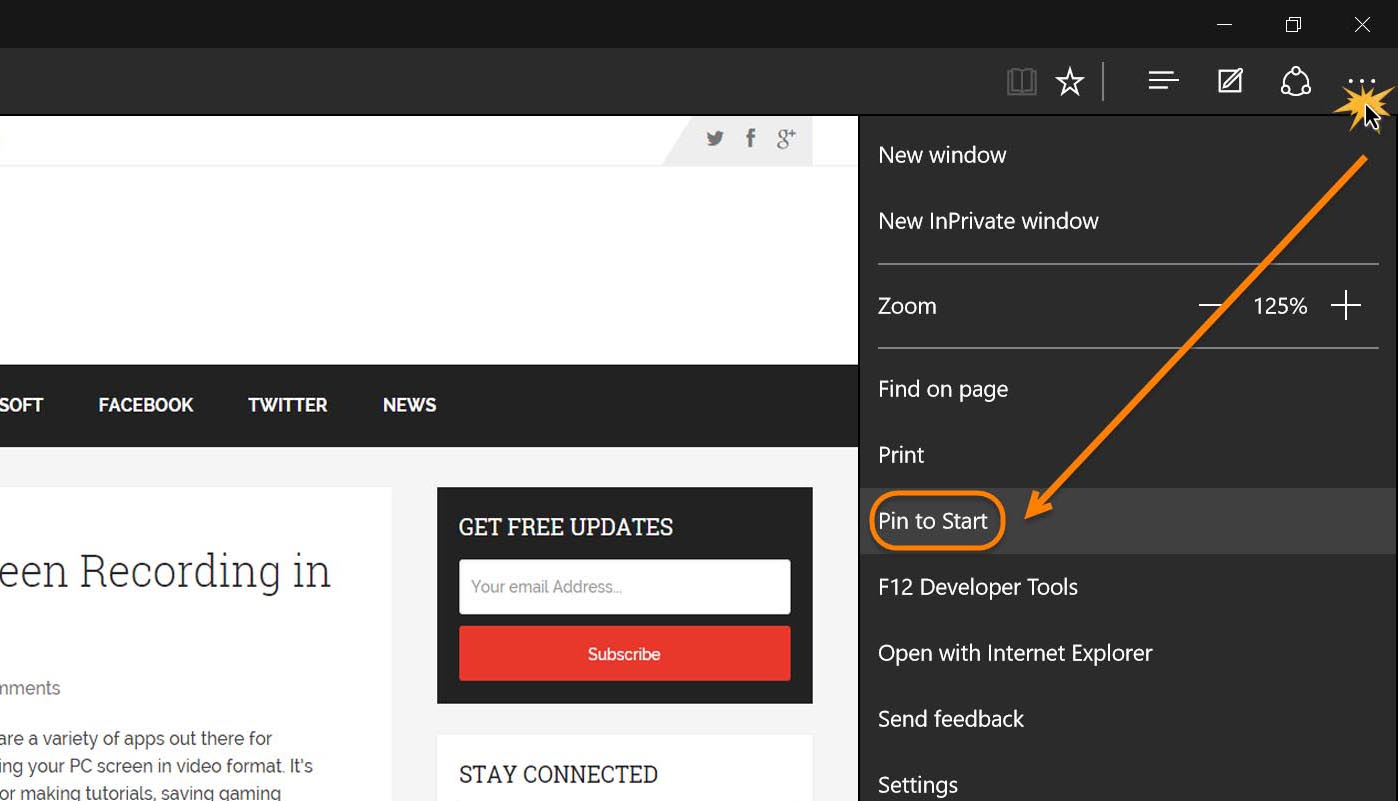
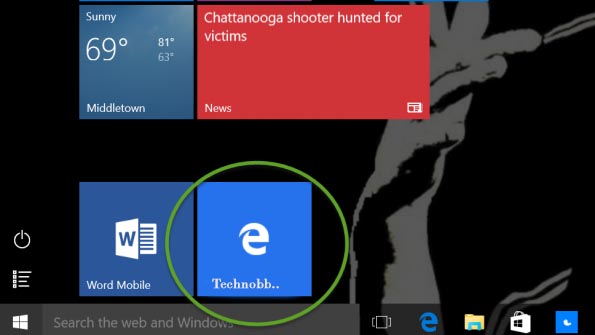
To pin a new site to your Start Screen, first open the Edge browser and go to the site you’d like pinned. Once there, on the top right you’ll see the three dots icon which opens up the options menu. Click that and you’ll then see an entry called ‘Pin to Start’ right below ‘Font’. Click ‘Pin to Start’ and the newly pinned site will appear on your Start Screen with a convenient tile that can be placed anywhere you like for the sake of aesthetics and convenience.

edge-browser-pin

If you add too many sites and use your Start Screen as a bookmark replacement, it will probably start looking crowded and unsightly. But for those sites that you visit the most often, it’s a great way to stay organized and efficient. If you want to remove a pinned site, simply right-click it and you’ll see an option to Unpin the tile from your Start Screen. That should help keep any unwanted stray tiles from cluttering up your screen.

Use Xbox app for Screen Recording in Windows 10

There are a variety of apps out there for capturing your PC screen in video format. It’s great for making tutorials, saving gaming footage or sharing your activities. Many of the best screen capture apps are not free and the free versions force a watermark on your recordings. Now it’s possible to record your screen in Windows 10 for free using the Xbox app. While this is mainly intended for recording gameplay from an Xbox, it also happens to work fine with any desktop app which is a major bonus. The one major drawback is that it cannot record multiple apps at once so it is limited for use in recording tutorials. You cannot switch to another app and have the whole process recorded, the Xbox app can only record one running app at a time. Follow these steps to record your screen in Windows 10 using the Xbox app.

1s

1. Launch the Xbox app.

2. Launch the app you wish the record. Then press the Windows button and ‘G’ simultaneously (Win + G) which will open the Game Bar.

3s

3. The Xbox app will ask to confirm that the app is a game. It does not matter whether the app is a game or not, the recording will work, so just confirm that the app is a game and launch the Game Bar.

s4

4. With the Game Bar open, you can either take a screenshot with the Camera icon, or begin recording video with the red circle Record icon. During recording, a small red indicator appears at the top of the screen to confirm that recording is taking place and the duration of the current recording. Clicking it will open the Game Bar again or you can press (Win + G) again to bring up the Game Bar.

s5

5. To end the recording, simply click the red indicator or bring up the Game Bar again and click the Record button. To quickly take a screenshot or stop and start recording you can also use some helpful keyboard shortcuts. Win + Alt + PrtScn will take a screenshot while Win + Alt + R will begin or stop recording.

s6

6. Once your recording is complete, you can find it along with any screenshots with File Explorer under ThisPC\Videos\Captures.

s7

You can also find any of your recording in the Xbox app under Game DVR. That’s all there is to it. This is a great feature for gamers but is also nice if you want to record a single app.

Updated: 27 March, 2020

Connect To a Bluetooth Device In Windows 10

Connecting Bluetooth devices is as easy as ever in Windows 10. If you’ve never used it, Bluetooth lets you pair devices wirelessly over short distances and is great for wireless mics, headsets, etc. and connecting a smartphone to another device. In Windows 10, the process is very simple and you can pair a Bluetooth device in minutes using the Settings app. Just follow this procedure to pair and use any compatible Bluetooth device with Windows 10.

win10-bt-pair

1. Go to Settings, then Devices and make sure the Bluetooth toggle switch is set to On. If it is not, your devices won’t be able to see your Windows 10 device and vice versa. It’s also possible that Bluetooth has been disabled in your systems BIOS in which case you will need to boot into the options menu on your system and enable it.

2. Now, make sure the device you want to pair with Windows 10 is on and discoverable. You’ll need to go into the Bluetooth settings area for your device and set it to search for nearby devices to connect to.

win10-bt-pair

3. If your device is searching and Bluetooth is on in Windows 10, it should now appear in the Windows 10 Manage Bluetooth devices window as Ready to pair’. Click the device you want to pair and then click thePair button below.

win10-bt-passcode

4. Depending on your type of device, it will likely now show an authentication passcode in a new window. Your device will also likely have this window with the passcode displayed. Just compare the two to see if they match and then click ‘Yes’ to finalize the pairing. If for some odd reason they do not match, you can attempt to pair again or make sure there isn’t some security issue with an unauthorized device.

5. After the pairing is complete, the device should be connected via Bluetooth to Windows 10 and you can enjoy whatever wireless communication benefits are specific to that device. It will also connect automatically to Windows 10 when it is in range if Bluetooth is enabled.

6. If you want to remove a device from your Bluetooth list in Windows 10, go back to the Devices area, select the device and click Remove device. It will no longer work over Bluetooth and will need to be paired again if you want to use it again with Windows 10.

Update: 28 March, 2020

Unjailbreak Your iOS Device With Cydia Impactor

Cydia Impactor is a new tool released by developer Saurik, which will allow users to reverse all jailbreak changes on their iOS device without having to update to a newer firmware. Previously this was not possible and you had to update to a newer and likely non-jailbreakable firmware if something became corrupt on your current jailbreak setup. Cydia Impactor removes that risk and allows you to revert your device to full factory settings on the same firmware, which is a very nice fallback option. For Cydia Impactor to work however, it does wipe all files during the restore procedure which includes all jailbreak related files as well as data stored on the phone. You can still make a full backup of your device via iTunes and iCloud so all your data is safe.

To revert jailbreak changes to your device with Cydia Impactor, follow these steps. Note that this only works on iOS 8.3 and 8.4 and does not yet work with an iPod Touch 6.

1. Launch Cydia, browse to and install Cydia Impactor.

cydiaimpactor3

2. Make a full backup of your device data to iCloud or iTunes.

3. Disable ‘Find my iPhone’ under Settings, iCloud, Find My iPhone.

4. Plug your device into a computer or charger and make sure it is over 50% charged.

5. Launch Cydia Impactor on your device.

cydiaimpactor1

6. Tap ‘Delete all data and unjailbreak device’ on the bottom, then tap ‘Delete All’.

cydiaimpactor2

7. The unjailbreak process will begin so you’ll have to wait a bit for it to complete.

hello-screen

When the process is completed, your device will be reset completely to factory settings like it’s brand new. You will be on the same firmware as it was when jailbroken and you will be able to restore all your files from the backup made previously. You can also choose to perform the jailbreak again and restore all your jailbreak tweaks and files to the device. Cydia Impactor is definitely a huge relief to those worried about keeping the option to jailbreak their devices.

5 Great Animated Watch Faces for Android Wear

Smartwatches let you express your personality and creativity with animated watch faces. Of course standard watches and pocketwatches have sported intricate moving faces for centuries, but never has it been possible to have such dynamic, moving, colored, and customizable faces on a watch. Even better, because it all happens on a screen, the faces can be swapped instantly with no physical moving parts and the possibilities are as endless as artistic expression. Android Wear is no slouch when it comes to animated faces. Here are 5 great animated faces that will be sure to liven up the already fun animated faces available.

1. Weareal Live 3D Watch Faces

Weareal uses a smartwatch’s internal motion sensors to create the illusion of natural lighting being reflected from the watch face. It’s an effect notable on physical watches that could have slight glare when light is reflected from the glass or plastic coated face. This effect is an amazing way to enhance the illusion of having a physical watch as opposed to one with a screen.

2. Space and Time Watch Face

This charming watch face lets you have a little spaceship and planet orbiting a moon with the time conveniently placed on the moon’s surface. The face looks great, the animations are smooth, and it is sure to please any fan of sci-fi, space, or playful watch faces.

3. Wear Time Circuit Watch Face

This watch face turns your watch into something that would be at home on the set of any sci-fi movie or show. A slick animation shows particles move across circuits while the time is told with a set of LED type dots. It’s a great package and really makes a watch look like it belongs on a time traveler’s wrist.

4. Pac-Man Watch Face

For fans of old school arcade games and Pac-Man, this is a great animated face that has Pac-Man chomping dots and ghosts as he makes his way around the watch face. The time is told in the center with a classic arcade font. It’s hard to beat this face for gaming nostalgia.

5. WatchMaker Premium

If you feel like trying your hand at making your own custom watch face, WatchMaker Premium is a fine choice. You’ll also have access to thousands of faces created by other users. There are dozens of options for the types of data the face can show, animations, etc. so you’re limited only by your imagination and it’s fun to create something new and share it with others.