When Windows 10 ships in just two months, it will come with a major change to how search is handled. Now, anytime you type anything into the search bar, Windows 10 will use Bing to search for results both locally and on the web. While some people might welcome this, others would see it as a hassle or privacy concern. This feature is sure to annoy many users who don’t want their search data constantly sent to Bing servers. Luckily there is a way to disable Bing from automatically running a web search with every search. Windows 10 may not be out yet, but why not be ready to disable it on day one?
1. Open Control Panel.
2. Search for Group Policy.
3. Select Edit Group Policy. This will open the Local Group Policy Editor.
4. Under Computer Configuration, select Administrative Templates.

5. Next select Windows Components.
6. Then select Search.
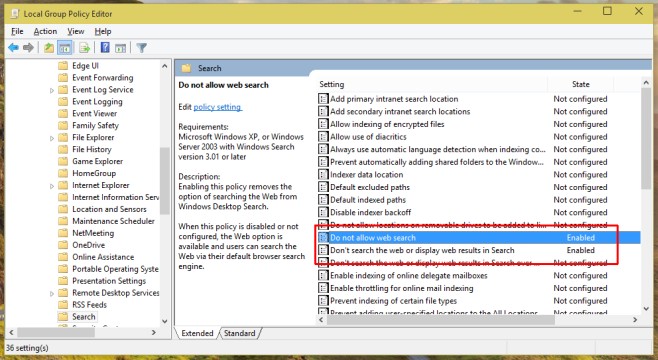
7. Find entries called ‘Do not allow web search‘ and ‘Don’t search the web or display web results in Search‘
8. Right click each entry, select Edit, then select Enable in the policy editing window, click Apply and close the window.
This should disable the automatic web search and your searches should now only run locally on your computer. Now Bing won’t automatically run a search every time you try to look for a file or something else stored on the computer locally. This is a cumbersome and obscure process that a lot of people would have trouble finding because it’s buried in Control Panel. It would be much simpler to have an option to quickly disable web search and it’s likely people will demand that this be implemented.
For those waiting to upgrade from Windows 7 and Windows 8, this is one annoyance that might prevent them from doing so. Hopefully this will be fixed in time for the official release or you can simply use this process to stop automatic web searches.