The unassumingly named File History feature lets Windows 10 save periodic backups of your files. Not to be confused with the feature that tracks your recently opened files, File History is a dedicated backup service that many users either aren’t even aware exists. It can be of great help when it comes to simple backup tasks, saving your work, retrieving older versions of files, recovering deleted files and more. Backing up files is not only necessary for a work or professional environment, it’s a good idea for almost anyone and can get you out of trouble more than a few times when used correctly. To start using File History, just follow these steps.
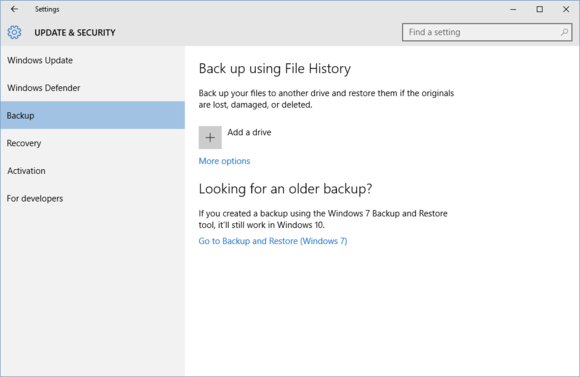
1. Begin by opening Settings from the Start menu, then click Update & Security. Once inside Update & Security, click on Backup on the left.
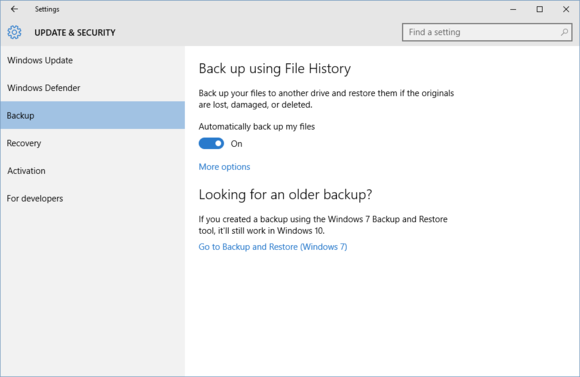
2. Now you will see an option called ‘Add a drive’ next to a button with a plus symbol. You will need to have an external storage device connected or will need to connect one at this point. Click the ‘plus’ button to add the drive you want to store your backed up files to. A prompt will appear and you can select the external drive to use with File History. Once complete, your files will automatically be backed up to this external drive and a slider switch will appear so you can choose whether or not these backups occur automatically.
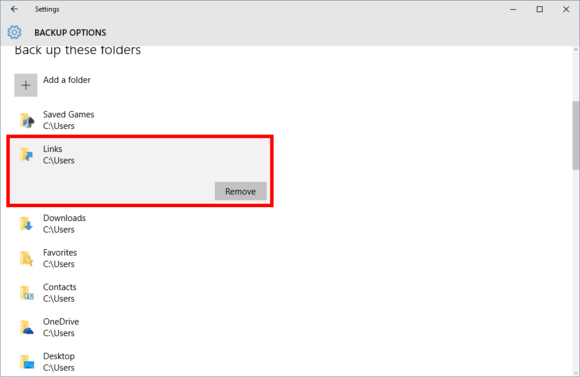
3. Windows 10 starts by backing up all folders in the Users directory. Clicking ‘More options’ below the ‘Automatically back up my files’ switch will let you access many more controls to adjust how File History handles your backups. Inside ‘More options’ you can add additional folders by clicking the ‘plus’ button, remove folders by clicking them and then clicking the ‘Remove’ button below, and create a list of folders to exclude from backups. You can also change the external drive where the files are saved and you can set how often you’d like backups to be made. By default, backups are made every hour. You can also set how long to keep your backed up files so that older ones can be removed to make room for more recent backups or for security and privacy reasons.
4. After setting up File History and with your backup drive connected, you can easily access stored earlier versions of files. Inside File Explorer, just right-click any file and click Properties. Then near the top of the Properties window, click the Previous Versions tab. You’ll be presented a list of all backed up versions of that file that you can open. It’s a thoughtful and very useful feature.
File History is a great feature and Windows 10 has made it easier than ever to set up and use properly. With it you can gain confidence that your files are saved, exert a fine degree of control over how files are backed up, and even have access to previous versions.